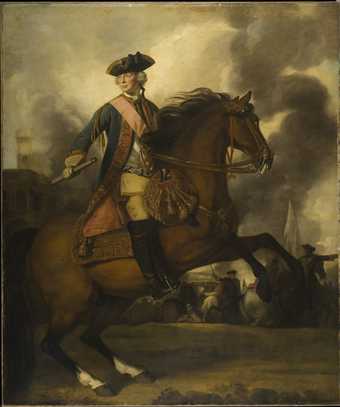
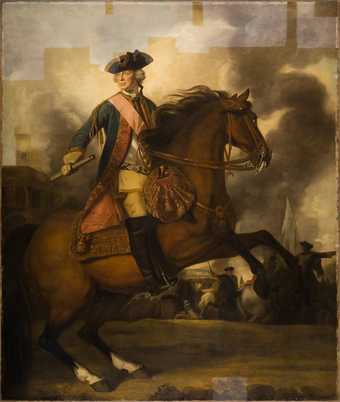
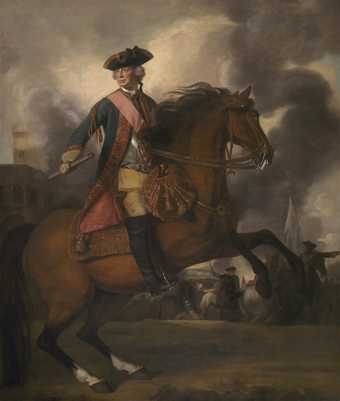
Restoration of Sir Joshua Reynolds’ Lord Ligonier 1760
Cleaning and varnish removal was now completed and the next stage of restoration could begin: the disguising of damage to the paint layer and the application of new varnish to produce the correct gloss and colour saturation of the surface.
An initial application of varnish: protection and saturation
Paint appears to us as coloured because pigment particles within it absorb parts of the spectrum of white light, and the human eye perceives the remaining light reflected back to us as coloured. If a surface is rough, most of the light hitting it is simply scattered, i.e. reflected back to us without interacting with the paint, so that we see mainly white light and the colour appears pale. Varnishing a surface greatly reduces scattering so that more light reaches the paint before being bounced back to us, so we see a more intense colour. We call this is an increase in saturation.
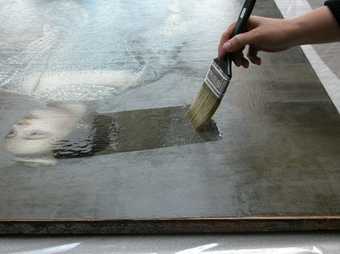
An example of applying varnish in the traditional way, using a brush.
An initial solution of varnish was applied with a brush, in exactly the same way artists have been applying varnish for centuries. A varnish is made by dissolving a resin in solvents like turpentine or white spirit. After application, the solvent evaporates leaving a hard, transparent, glossy film of resin on the surface. As well as saturating the paint surface, this first varnish provides a reversible protective layer over the original paint.
Traditionally, artists have used natural resins made from tree sap for varnishing, such as mastic. Chosen for their high gloss and easy handling with a brush, natural resins have a significant drawback: they become significantly yellow and more difficult to remove within 50 years. To avoid this, conservators frequently use synthetic resins which have been specially formulated for increased physical and chemical stability. The polycyclohexanone resin MS2A, developed for use in conservation, was used to varnish Lord Ligonier. The MS2A resin should remain clear, transparent and easy to remove for at least 100 years in gallery conditions.
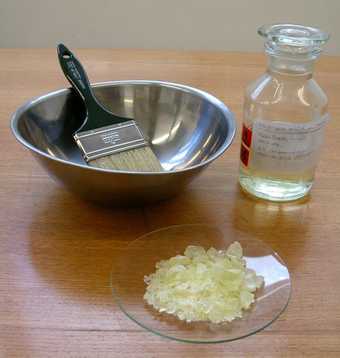
MS2A resin in dry form and made up into a varnish, pictured with a traditional brush for application.
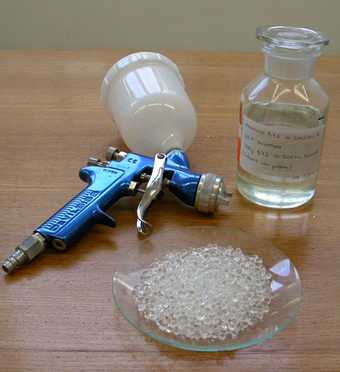
B72 resin in dry form and made up into a varnish, pictured with a modern spray gun for application.
The paint surface of Lord Ligonier 1760 has a network of tiny cracks that have developed owing to age, drying problems and past treatments. The MS2A varnish, which has a small molecular size, was absorbed into this crack pattern in many areas, leaving the surface with matt patches, a problem known as ‘sinking’. To even out the gloss, a different varnish was applied using a spray gun. The acrylic resin B72 was used, as it is a stable polymer with long chain molecules, ideal for creating an even surface. The large resin molecules remain on the surface of the paint, physically unable to fit into the voids in the microscopic surface texture.
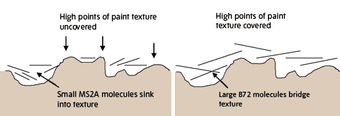
Diagram showing the topography of a porous paint surface, illustrating how small molecules tend to ‘sink’ but larger polymer molecules stay on the surface of the microscopic texture.
Restoring areas of damaged paint
The visual qualities of the painting were much improved after varnishing. However, as with most paintings of this age, there were small paint losses scattered across the surface. The illusion of depth skilfully created by an artist is easily disrupted by damages on the surface that draw the eye and remind us that we are looking at a two-dimensional painting. If we are trying to restore the pictorial effect and impact of the painting, then obtrusive damages to the surface must be disguised.
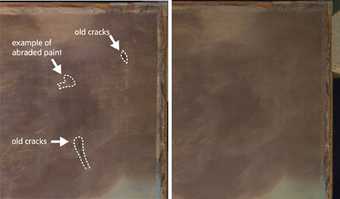
Detail of the top right corner of the painting before inpainting, showing old damages, cracks and insoluble overpaint and the same area after inpainting and final varnishing.
The method of applying new paint to disguise damage and paint loss is now correctly known as inpainting, but more commonly referred to as retouching. The term inpainting gives more idea of the modern principle followed: the conservator restricting their work to missing areas only so that no original paint is covered.
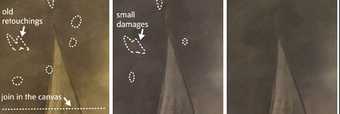
From left to right: The flag area before treatment, showing large discoloured retouchings applied in the nineteenth century; the flag area after cleaning, showing the small damages below; the flag area after treatment and accurate inpainting of the damages.
To prepare an area of damaged paint for restoration, the first step is to make sure that paint losses are filled with a stable and durable filler, bringing the surface level with the surrounding paint and recreating a convincing texture. For Lord Ligonier, a filler made from chalk bound in an acrylic medium was used. Then new paint is applied to disguise the damage.
The paint used by a conservator is very different from that used by the artist, and usually consists of dry pigment in powder form, ground by hand in a synthetic resin medium. For Lord Ligonier, MS2A resin, which was used for the first varnish, was also used to bind the paint. This inpainting will remain easily reversible and should not discolour with age. Some of the pigments used for inpainting have been used by artists throughout history, for example the earth pigments umber, yellow ochre and sienna. Others are modern synthetic pigments, chosen for their non-toxicity, stability and resistance to fading and discolouration. For example, titanium white is now used instead of flake white, the toxic lead carbonate which is prone to yellowing as it accelerates the degradation of its oil medium. When applying the new paint, the conservator uses skill and experience to imitate the area surrounding the paint loss, mimicking the effects of age and wear to get a perfect match.
A final layer of varnish
The final step of the restoration process was to spray the painting with several very thin coats of B72 varnish. The finely misted layers increased the saturation of the paint layers below, bringing out the colours fully and providing a pleasing sheen for the final surface.
An overview of the treatment can be seen by comparing the paintings in the slideshow at the top of the page. They show how the range of colour, sense of texture and three-dimensional illusion has been returned to the portrait.

