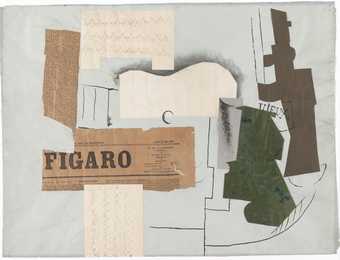
Pablo Picasso
Bottle of Vieux Marc, Glass, Guitar and Newspaper
(1913)
Tate
What is cubism and why was it so radical?
In around 1907 two artists living in Paris called Pablo Picasso and Georges Braque developed a revolutionary new style of painting which transformed everyday objects, landscapes, and people into geometric shapes. In 1908 art critic Louis Vauxcelles, saw some landscape paintings by Georges Braque (similar to the picture shown above) in an exhibition in Paris, and described them as ‘bizarreries cubiques’ which translates as ‘cubist oddities’ – and the term cubism was coined.
By comparing a cubist still life with an earlier still life painted using a more traditional approach, we can see immediately just what it is that made cubism look so radically different from earlier painting styles. Both paintings are of musical instruments. The first is by Edward Collier and was painted in the seventeenth century. The second is by cubist Georges Braque.
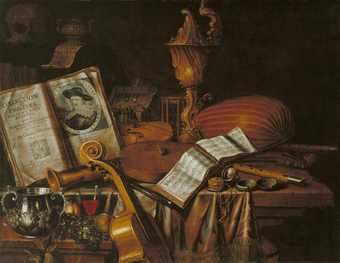
Edward Collier
Still Life with a Volume of Wither’s ‘Emblemes’
(1696)
Tate
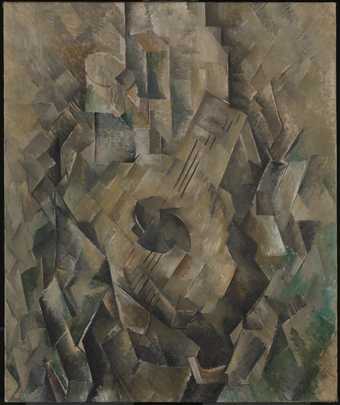
Georges Braque
Mandora
(1909–10)
Tate
Compare the way the instruments are painted in the paintings. Which look the most real? How has Collier made the objects in his painting look realistic? (Look at how he has used shading or tone, colour, perspective and also how he has applied the paint). What rules do you think the cubists broke?
Meet the cubists
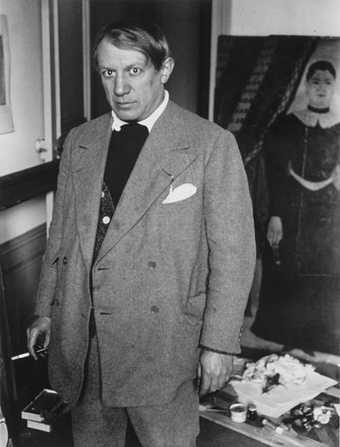
Brassaï, photo of Picasso in his studio at 23 rue La Boétie, standing in front of Rousseau’s Portrait of a Woman 1932. Musée Picasso © ESTATE BRASSAÏ -R.M.N.
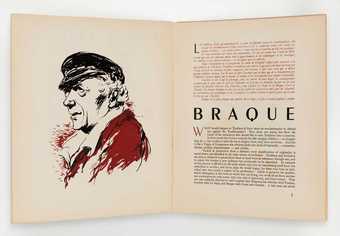
Georges Braque, London 1946 (inner pages) from Tate Publishing
In 1907 Georges Braque visited Pablo Picasso’s studio. This studio visit marked the beginning of one of the most important friendships in the history of art. Over the next few months and years the two artists shared their ideas, scrutinized each other’s work, challenged and encouraged each other. At some stage in around 1907 or 1908 they invented an exciting new style of painting – cubism. Their close working relationship at that time was later described by Georges Braque:
The things that Picasso and I said to one another during those years will never be said again, and even if they were, no one would understand them anymore. It was like being roped together on a mountain
Picasso and Braque were soon joined in their art adventure by other artists who were experimenting with different ways of depicting the world around them. Artists such as Juan Gris, Albert Gleizes, Jean Metzinger and Robert Delaunay who all worked in a cubist style.
Cubism explained
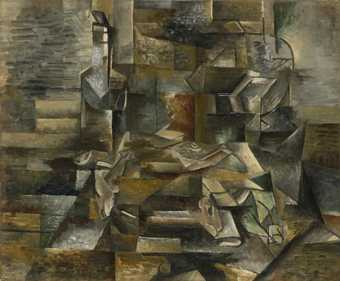
Georges Braque
Bottle and Fishes
(c.1910–12)
Tate
Cubism looks very different to lots of other styles of painting. How does it work? What were Braque and Picasso's reasons for turning their back on traditional techniques? How did the cubists develop their new style?
The illusion of space
Since the Renaissance in the fifteenth century, European artists had aimed to create the illusion of three-dimensional space in their drawings and paintings. They wanted the experience of looking at a painting to be like looking through a window onto a real landscape, interior, person or object.
How do you make things look three-dimensional on a two-dimensional surface? Techniques such as linear perspective and tonal gradation are used. Perspective involves making things look bigger and clearer when they are close up, and smaller and less clear when they are further away. By doing this you can create the illusion of space. Artists also use tones (shadows) to create the illusion of three-dimensional objects. By gradually changing the darkness of a shadow, you can make something look solid.
These drawings by J.M.W Turner show how perspective and tone (or shadow) can be used to create the illusion of real, solid three-dimensional objects.
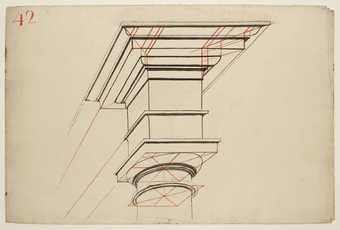
Joseph Mallord William Turner
Lecture Diagram 42: Perspective Construction of a Tuscan Entablature
(c.1810)
Tate
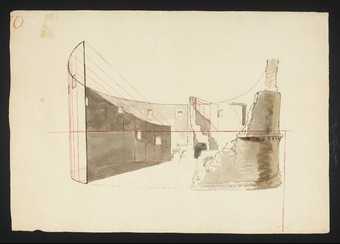
Joseph Mallord William Turner
Lecture Diagram 70: A Ruined Amphitheatre
(c.1810)
Tate
A new reality
The cubists however, felt that this type of illusion is trickery and does not give a real experience of the object.
Their aim was to show things as they really are, not just to show what they look like. They felt that they could give the viewer a more accurate understanding of an object, landscape or person by showing it from different angles or viewpoints, so they used flat geometric shapes to represent the different sides and angles of the objects. By doing this, they could suggest three-dimensional qualities and structure without using techniques such as perspective and shading.
This breaking down of the real world into flat geometric shapes also emphasized the two-dimensional flatness of the canvas. This suited the cubists’ belief that a painting should not pretend to be like a window onto a realistic scene but as a flat surface it should behave like one.
Look at this painting by Georges Braque of a glass on a table. Can you spot the techniques he has used to emphasize the flatness of the picture, but at the same time, made the objects look solid?
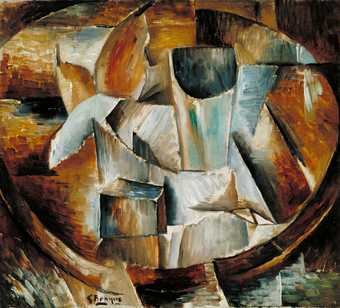
Georges Braque
Glass on a Table
(1909–10)
Tate
The phases of cubism: Analytical vs synthetic
Cubism can be split into two distinct phases. The first phase, analytical cubism, is considered to have run until around 1912. It looks more austere or serious. Objects are split into lots of flat shapes representing the views of them from different angles, and muted colours and darker tones or shades are used. The second phase, synthetic cubism, involves simpler shapes and brighter colours (and looks more light-hearted and fun!)
Practical activities
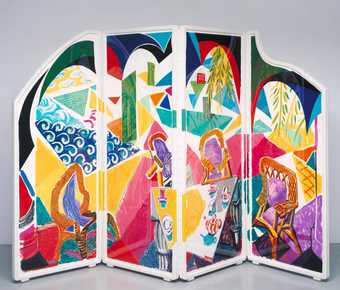
David Hockney
Caribbean Tea Time
(1987)
Tate
Use these activity suggestions to explore ideas and create a cubist masterpiece updated for the twenty-first century.
Activity 1: Research influences
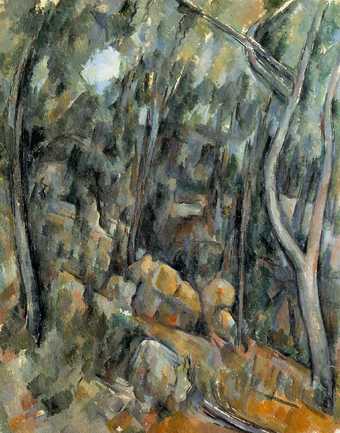
Paul Cézanne
The Grounds of the Château Noir c.1900–6
Lent by the National Gallery 1997
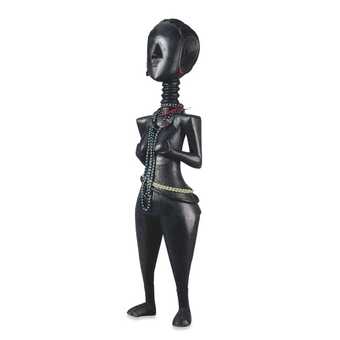
Carved wooden female figure (minsereh)
Mende, probably late 19th century AD, From Sierra Leone
Trustees of the British Museum
There were two key influences on the development of cubist style: the paintings of Paul Cézanne and sculptures created by non-European artists. Use these activities to explore these two artistic approaches
Cézanne’s approach
Braque and Picasso greatly admired Paul Cézanne. Cézanne’s paintings of figures and landscapes are made up of small planes (flat shapes) and repeated brush strokes. They often seem to be painted from slightly different viewpoints. It is this influence that we can see in the work of the cubists.
If you look at Cézanne’s painting of trees and rocks in the grounds of the Château Noir, the surface seems to vibrate with a mesh of tiny interlocking planes.
- Select a small section of the image and copy it, enlarging it so that it fills your page
- Use paint, crayons or pastels to copy the marks and colours
Sculptures from non-European cultures
Picasso and Braque were amazed by the sculptures they saw in the Trocadero museum in Paris. Picasso described sculptures from French Polynesia and Africa as ‘the most powerful and most beautiful things the human imagination has ever produced’.
Look closely at the sculpture above. Think about the following and make notes in your sketchbook
- Where is it from?
- How big do you think it is?
- Is it realistic?
- Has the sculptor simplified the figure?
- Do parts of it seem exaggerated or emphasised?
- What does the sculpture make you think and feel?
- What do you think the sculpture was originally made for?
Create
Create a portrait using sculptures from non-European cultures as your inspiration. This can be a self-portrait or a portrait of someone else.
- Use your notes about the sculpture you chose from the slideshow above to help you with approach and technique
- How has the sculptor simplified and exaggerated the forms. What effect does this have on your response to the work?
- Can you create a similar effect in your portrait?
Activity 2: Investigate viewpoints

Georges Braque
Glass on a Table
(1909–10)
Tate
The cubists wanted to show the whole structure of objects in their paintings without using techniques such as perspective or graded shading to make them look realistic. They wanted to show things as they really are – not just to show what they look like. They did this by:
- Emphasizing the flatness of the picture surface by breaking objects down into geometric shapes
- Depicting objects from lots of different angles. In this way they could suggest the three-dimensional quality of objects without making them look realistic.
Activity
Create a simple still life using the cubist technique of multiple viewpoints
- Choose three simple objects and group them together (e.g. trainer, mobile phone, apple, headphones, soft-drink can)
- Sketch or photograph the group of objects from four different viewpoints. (Viewpoints could include from the front, from above, from each side, from close-up, from far away…)
- Cut up each sketch or photograph into eight sections
- Choose two sections from each original sketch / photograph and put them together to form one image .
If you have access to picture editing software you can use this to create your picture. Use the tips below:
- Photograph your still life from four different viewpoints and save these images
- Select a small section from each photograph using the square marquee tool
- Open a new image and paste two sections from each original photograph to form your different viewpoint still life.
Activity 3: Explore shape, pattern, and texture
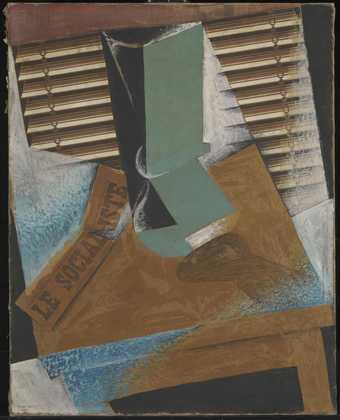
Juan Gris
The Sunblind
(1914)
Tate
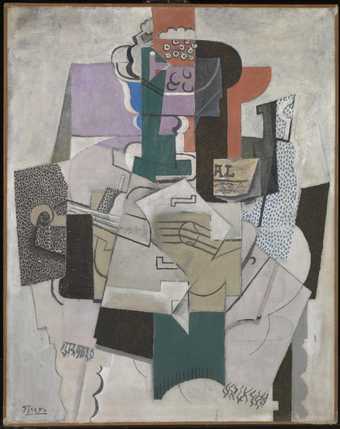
Pablo Picasso
Bowl of Fruit, Violin and Bottle
(1914)
Lent by the National Gallery 1997
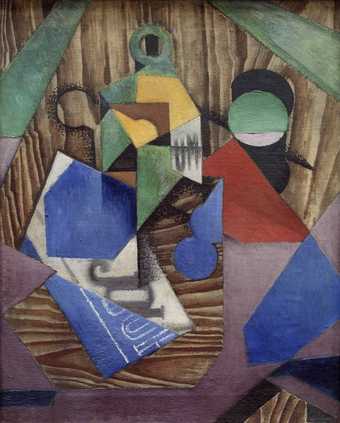
Juan Gris
Bottle of Rum and Newspaper
(1913–14)
Tate
From around 1912 Braque, Picasso, and other artists working in a cubist style such as Juan Gris, started to use simpler shapes and lines and brighter colours in their artworks. They also began to add textures and patterns to their work, often collaging newspaper or other patterned paper directly into their paintings. This approach was called synthetic cubism. Browse the slideshow to remind yourself what it looks like.
Activity
Create a still life in the synthetic cubist style that explores shape, pattern and texture. Use the three objects you selected earlier, but this time use only flat shapes, simple lines and patterns to depict them in a still life. Here are some ideas.
- You could draw a simple outline of the objects onto brightly coloured or patterned sheets of paper such as newspaper or wrapping paper. Cut these shapes out and collage them into your still life
- Think about the negative shapes (the shapes left in the paper once you have cut your object out of it). Could you add these to your still life?
- Look at the shadows made by the objects. How can you make these shadow shapes part of the work?
- If your objects include text or numbers (such as the title of a book or a brand name on trainers), use numbers or letters cut from a magazine or newspaper
- Don’t be afraid to mix media. Use charcoal or wax crayon to draw shapes or details over collage. Use paint to cover flat bright areas, or to add texture or pattern to your still life.
If you are still stuck for ideas, this animation may help!
Activity 4: Be inspired by other artists
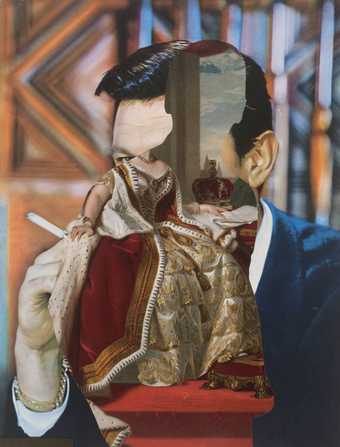
John Stezaker
Third Person
(1988–9)
Tate
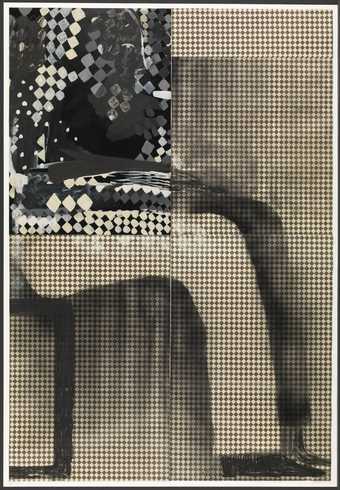
Phoebe Unwin
Man with Heavy Limbs
(2009)
Tate
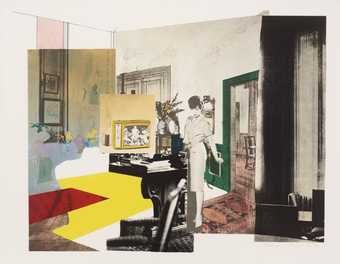
Richard Hamilton
Interior
(1964–5)
Tate
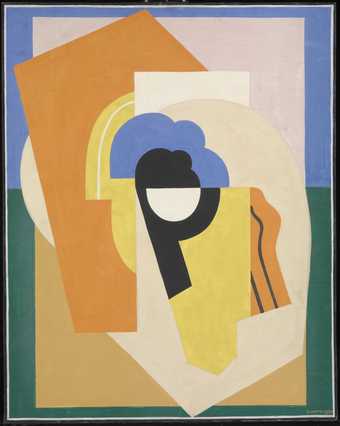
Albert Gleizes
Painting
(1921)
Tate
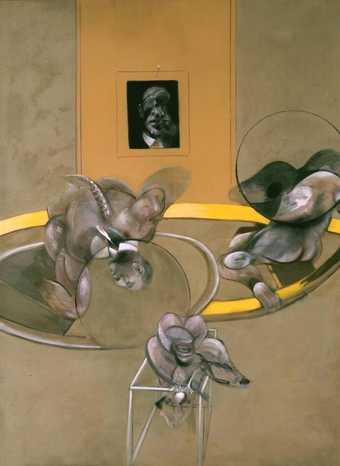
Francis Bacon
Three Figures and Portrait
(1975)
Tate
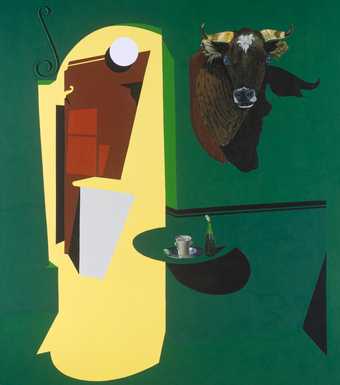
Patrick Caulfield
Hemingway Never Ate Here
(1999)
Tate
© The estate of Patrick Caulfield. All Rights Reserved, DACS 2024
Braque and Picasso developed cubism a century ago, but artists and designers have been influenced by the ideas and techniques ever since. How have they updated cubism?
Activity
Choose a cubist-inspired artwork from the works above or from Tate’s collection. Make a quick drawing of it in your sketchbook. Think about the following and annotate (add notes to) your drawing with your thoughts:
- How do you think the artist was influenced by cubism?
- Why do you like the artwork? What does it make you think or feel?
- Is there anything in the artist’s approach that gives you ideas for how you could update cubism?
Activity 5: Create your own cubist artwork

Juan Gris
Bottle of Rum and Newspaper
(1913–14)
Tate
You have investigated cubist sources and approaches and have researched how other artists have used cubist ideas and style. Now plan your artwork using what you have discovered, and update cubism for the twenty-first century.
- Review what you have found out about cubism
- Decide what you think are the key features of cubism. Which of these will you make use of in your artwork? List your ideas in your sketchbook
- Braque and Picasso painted ordinary objects that were part of their everyday lives. Think of objects that reflect your lifestyle and interests. Make a note of them in your sketchbook
- Braque and Picasso experimented with techniques and approaches. Can you think of ways you could use technology to make a state-of-the-art still life?
You should now have plenty of ideas for your updated cubist still life. Picasso and Braque were innovators, experimenting with radical new approaches in the way they depicted the world they saw around them. Their artworks still seem exciting and daring to us one hundred years later. Make sure your artwork has what it takes to inspire others and stands the test of time!

